Window construction
Pre-wall installation (climate compliant)
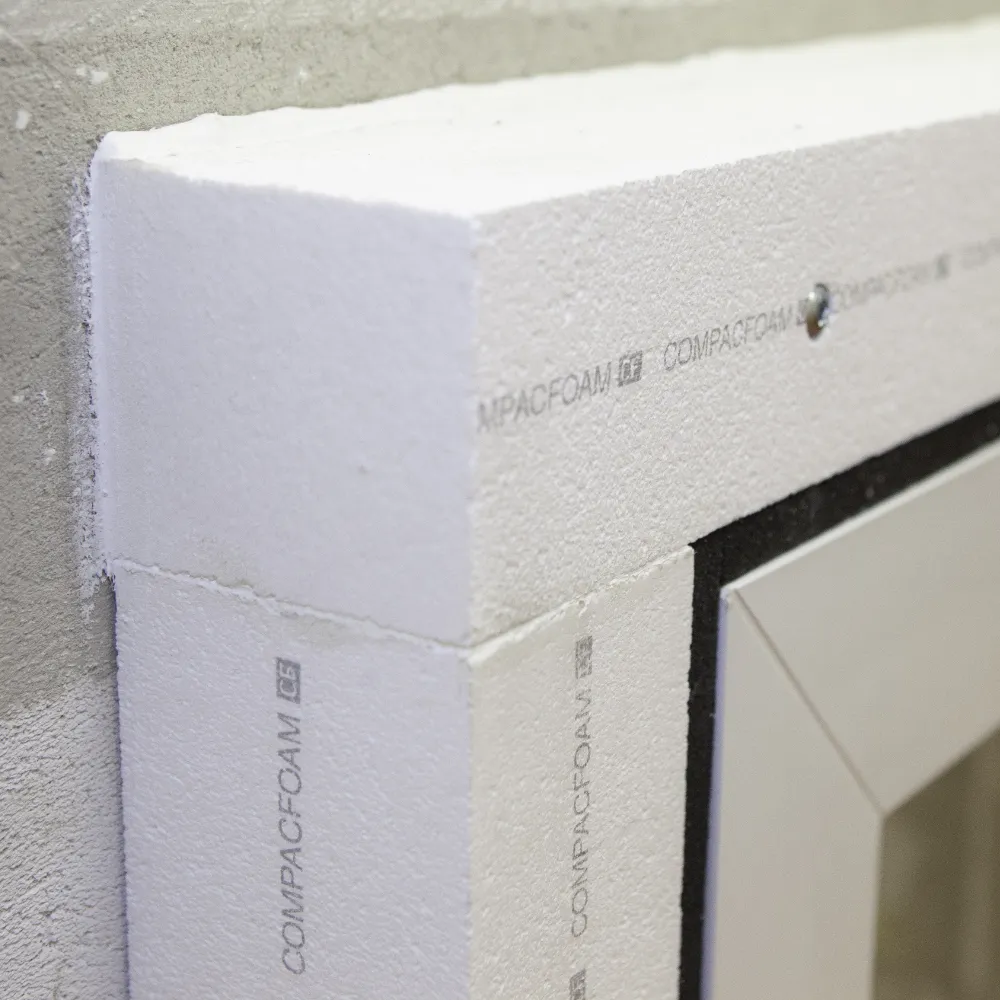
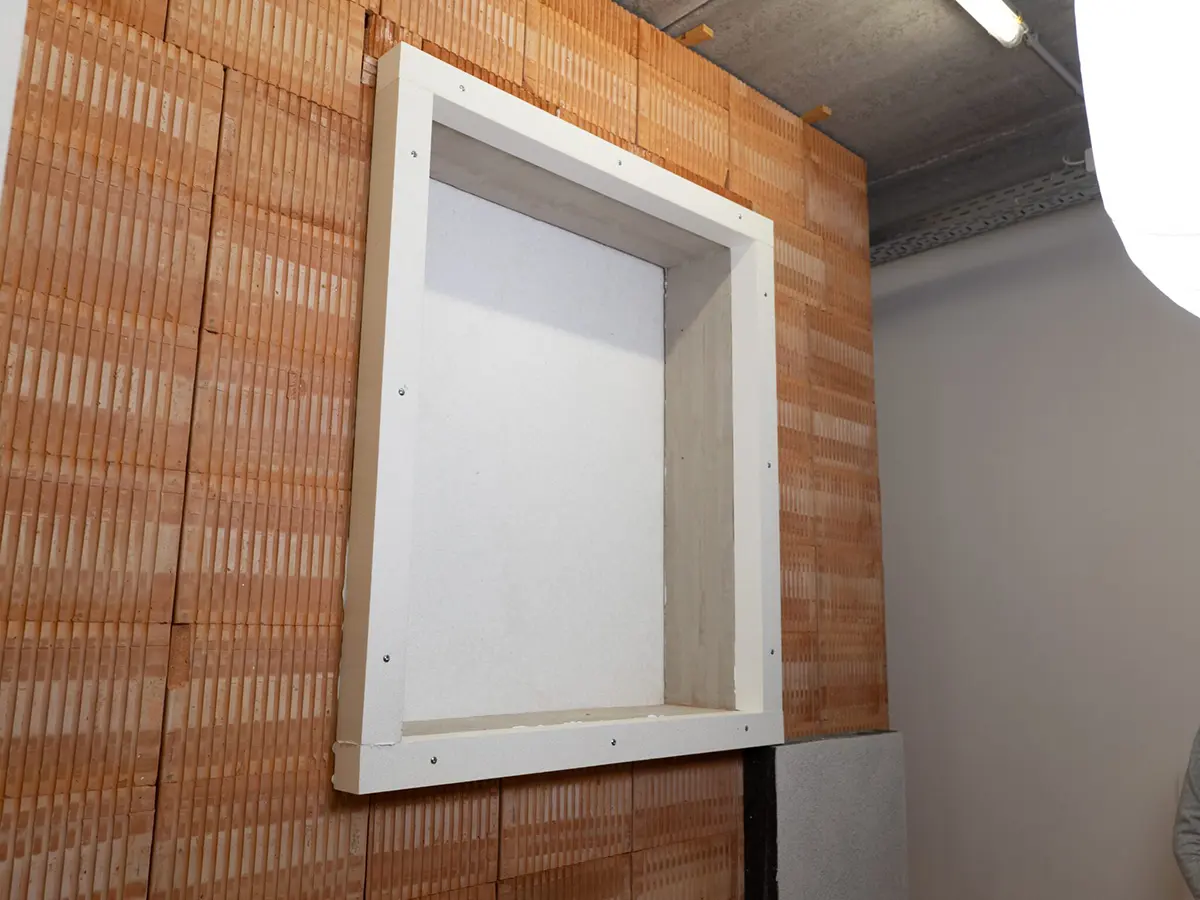
With the COMPACFOAM Klima Konform system, windows and doors can be installed in the insulation layer (ETICS) without thermal bridges. This means that the windows and doors move to the outside of the thermal insulation.
This method is called pre-wall installation. Installation in the insulation level has several advantages. Firstly, it looks better and brings more light into the rooms. The solar energy gained in this way leads to solar heat gains and improves the building's energy balance. In addition, the isothermal curves in the transition between the window and wall system are positively influenced.

Economical and safe
Details
Lateral connection

Lower connection


Tolerance
Length: +5/-0 mm, bending <3 mm free-standing
Material
CF125 or CFeco200
Transfer of vertical loads:
Each window construction is supported by point support blocks in the frame. The entire dead load of the window is concentrated under these support points and must be safely transferred into the wall.

Version 1
Force per fixing point < 0.86 kN

Version 2
1 additional fixing point
Force per fixing point < 1.23 kN

Execution 3
2 additional fixing points
Force per fixing point < 1.72 kN
A bracket (version 3) must be used if the projection of the climate-conforming profile is > 100 mm. The individual contact forces at the fixing points can be determined using the COMPACFOAM fixing calculator. Contact us to receive your individual dimensioning.
Transfer of horizontal loads:
Horizontal loads in window constructions arise due to wind or impact on the glazing panes. From there, they are transferred to the frame construction. This load is transferred to the mounting frame at a point via the side screw connection.

Lower connection

Lateral connection

Lateral connection with wide projection

A....max. screw connection distance top and side <700mm or according to static requirements
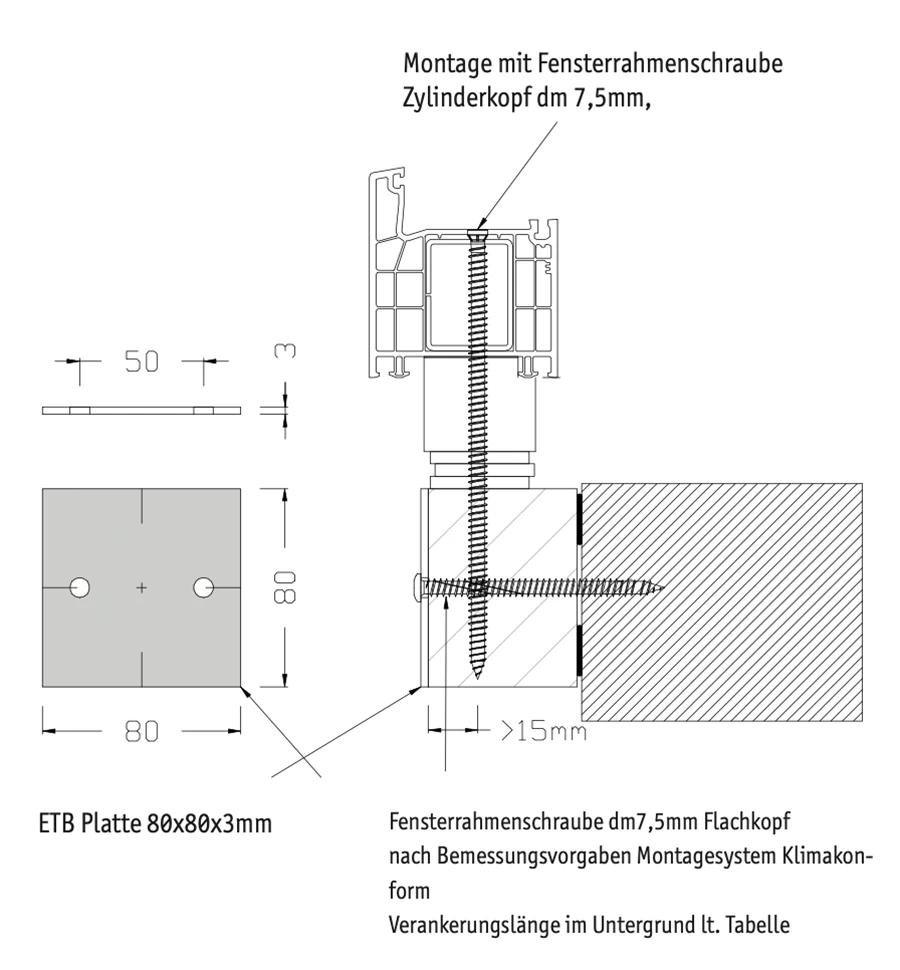
B....max. distance between supports at the bottom <500mm, arrangement under corner points of the fixed panel Window frame screw cylinder head ø 7.5mm, distance and anchoring length in the substrate according to static requirements or RAL guideline. No pre-drilling required in the substructure insulation profile!

Lower connection
Screw connection from below

Lower connection
Screw connection from above
Lateral connection

Lower connection


A....max. screw connection distance <700mm
Window frame screw cylinder head
ø 7.5mm, distance and anchoring length in the substrate
according to static requirements or RAL guidelines. No pre-drilling required in the substructure insulation profile!
Tolerance
Length: +2/-2mm Milling tolerances: +/-0.3 mm Bending <3mm Free-standing feather keys +0.0/-0.5mm
Material
CF125 or CFeco200
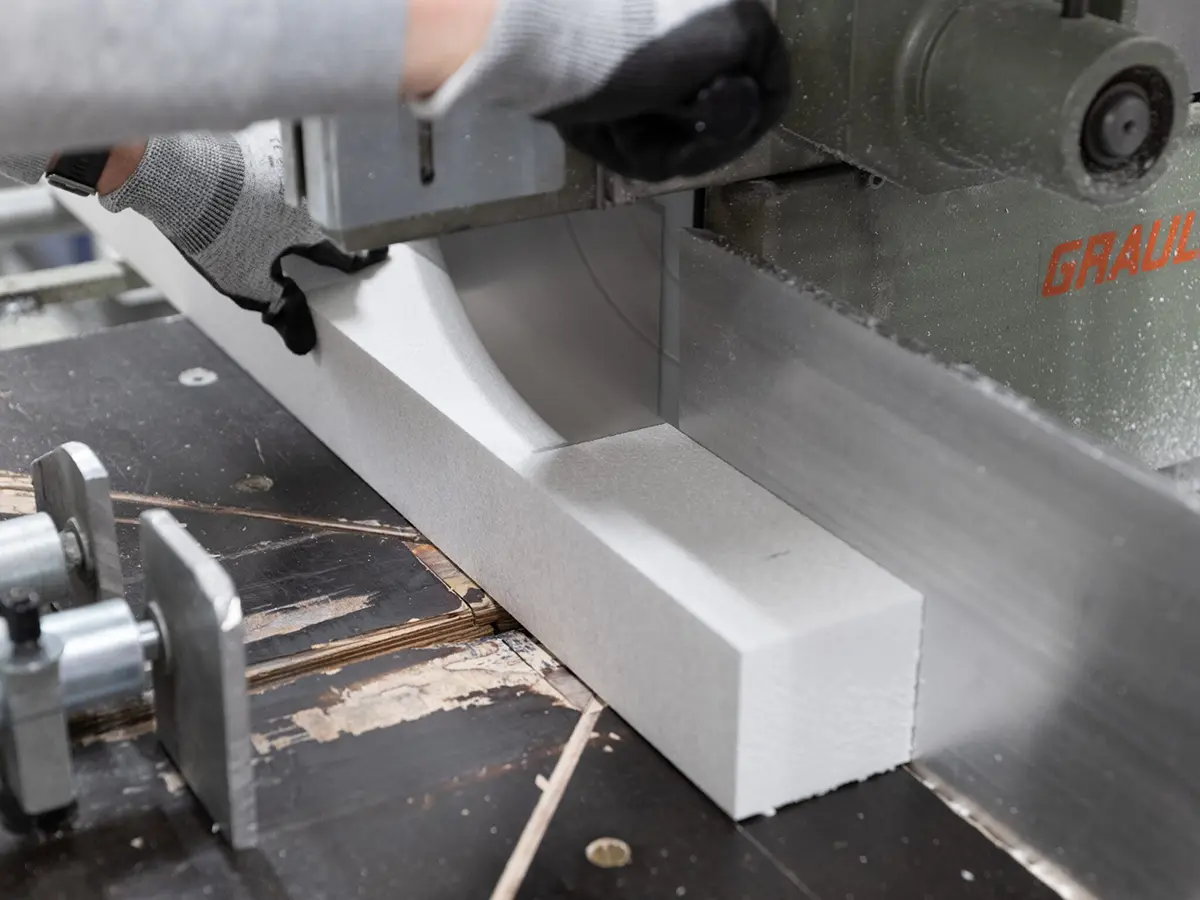
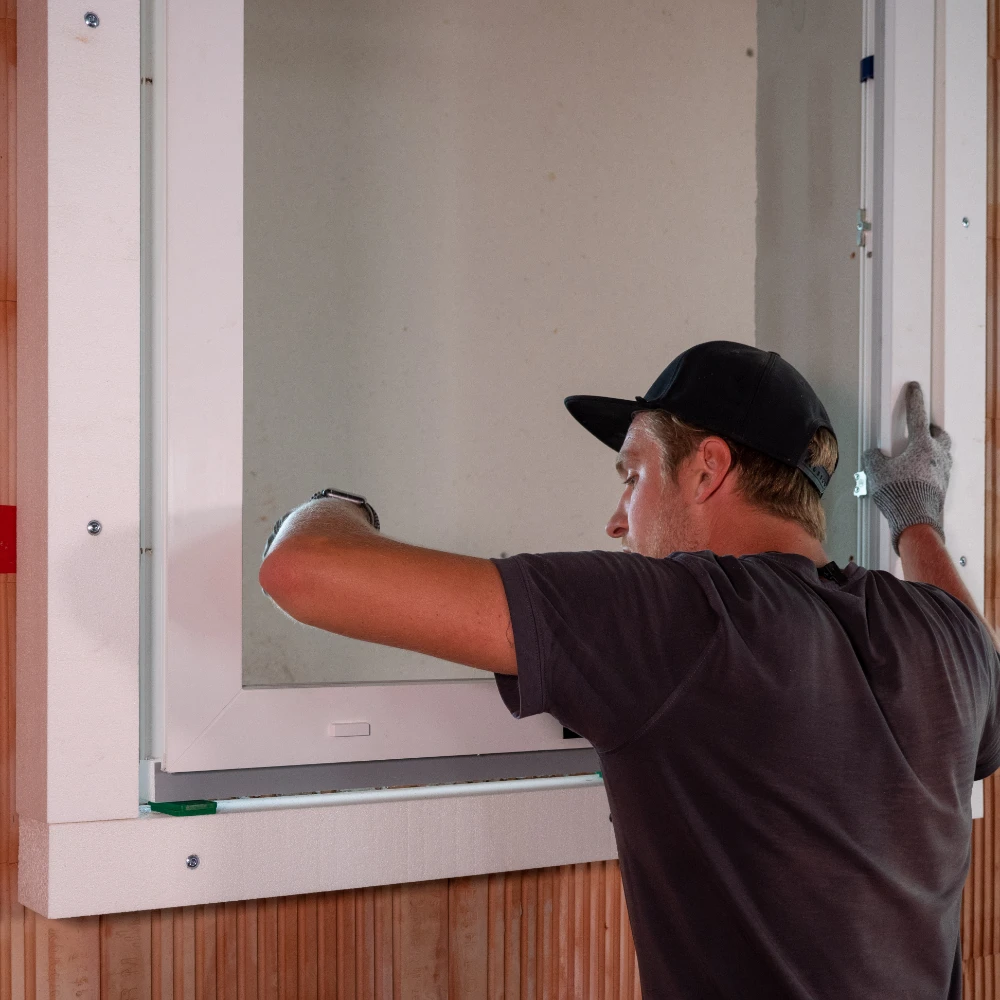
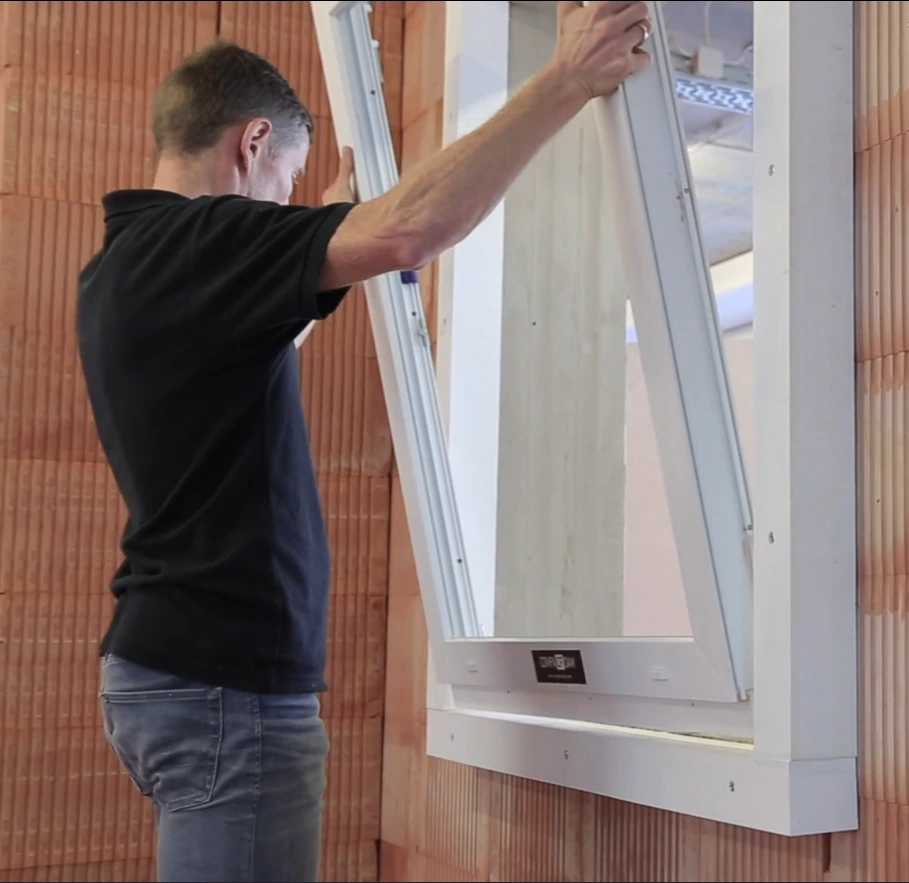
1. cutting the profiles to size
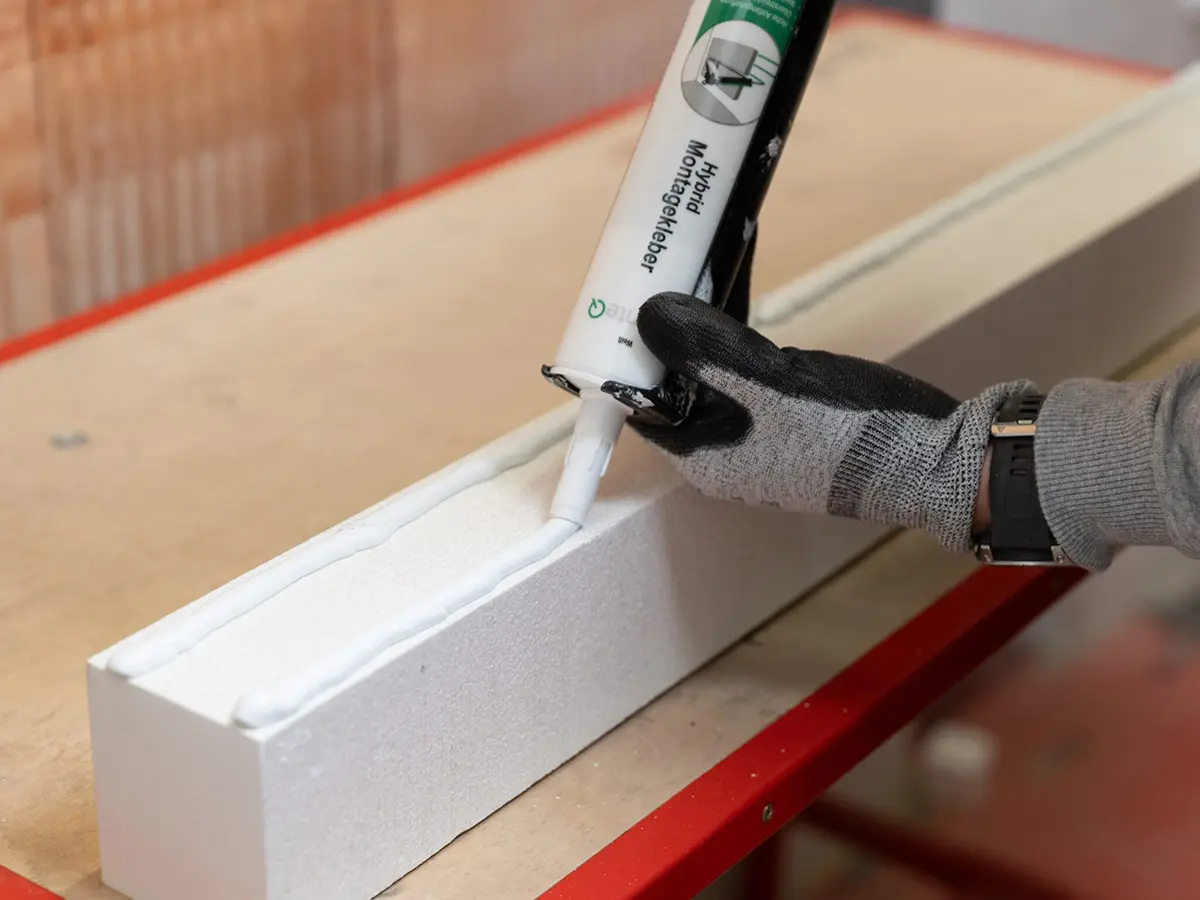
2. apply adhesive
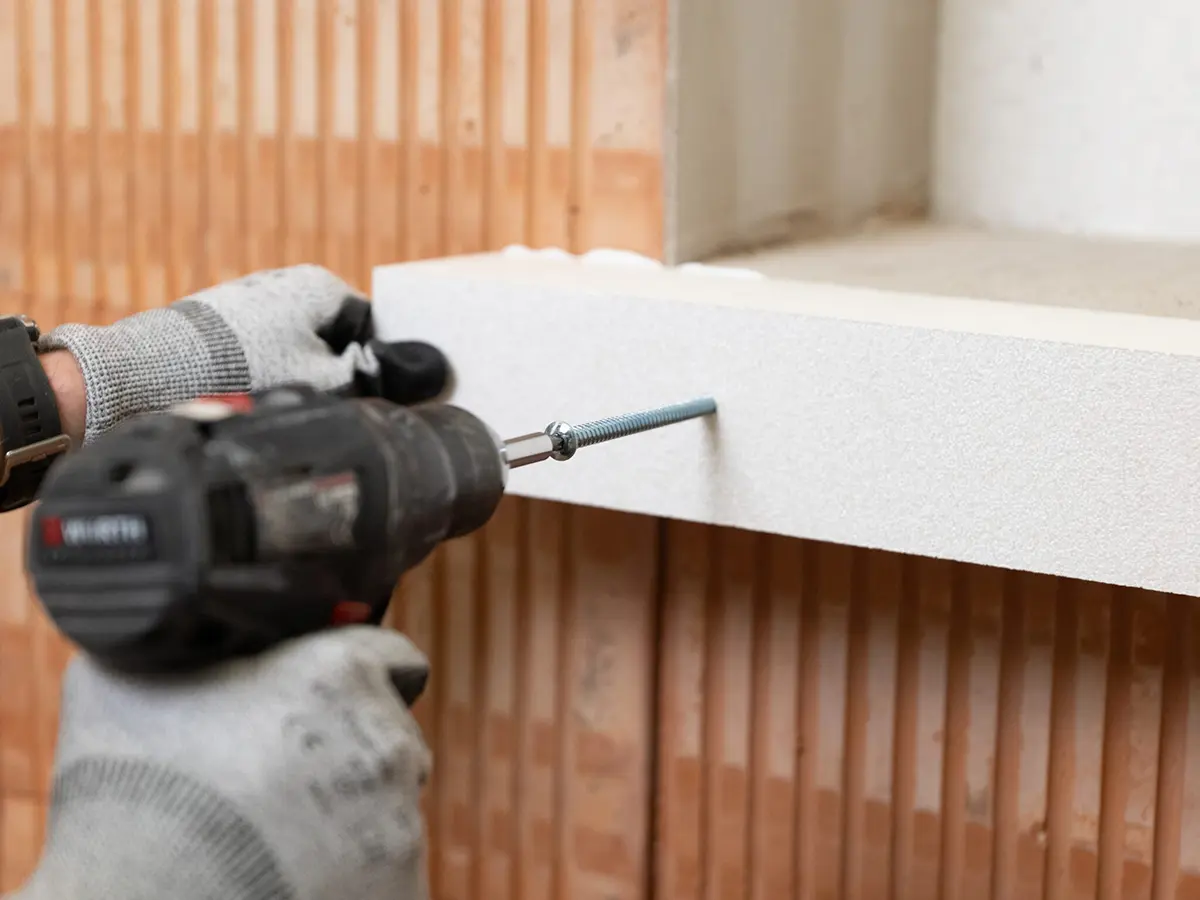
3. pre-drilling and screwing
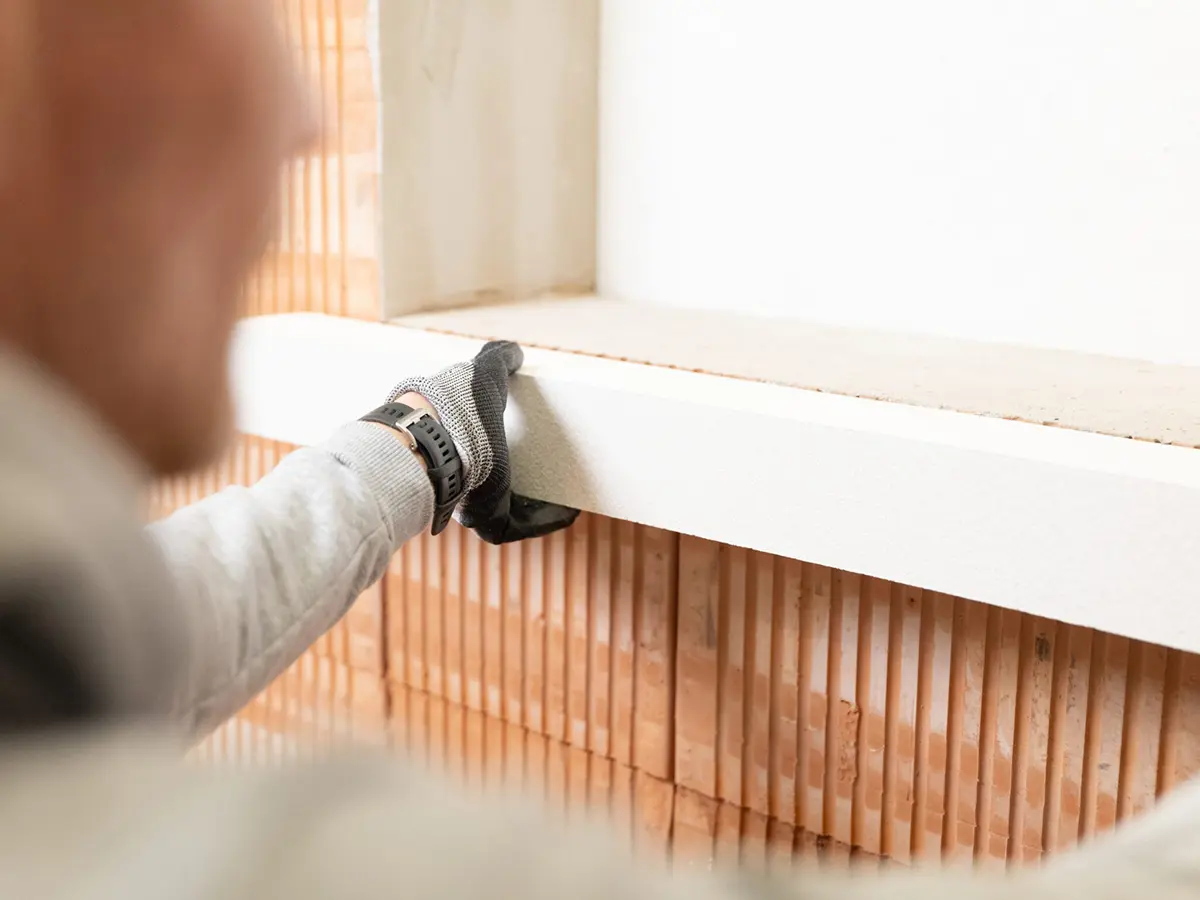
4. positioning and aligning the remaining transoms
Diversity of the climate conformity system
The Klima Konform system offers customized special solutions for demanding construction projects. Whether flexible cross-sections, special shapes, integrated insulating wedges or individual soffit solutions - almost any requirement can be realized. Specially manufactured inclined profiles in the upper area also offer optimum protection against rainwater during the construction phase.
The products are warp-free and bend-free, which guarantees outstanding stability. Thanks to their low weight and high strength, they are also quick and easy to install.
This variety of options ensures perfect adaptation to every project and sets new standards in functionality, efficiency and quality.
We also supply any cross-sections in very small quantities at low prices.
Precise production is guaranteed by state-of-the-art technologies:

Drill the lower transom 150 mm from the end of the transom and drill the following holes at 700 mm intervals.
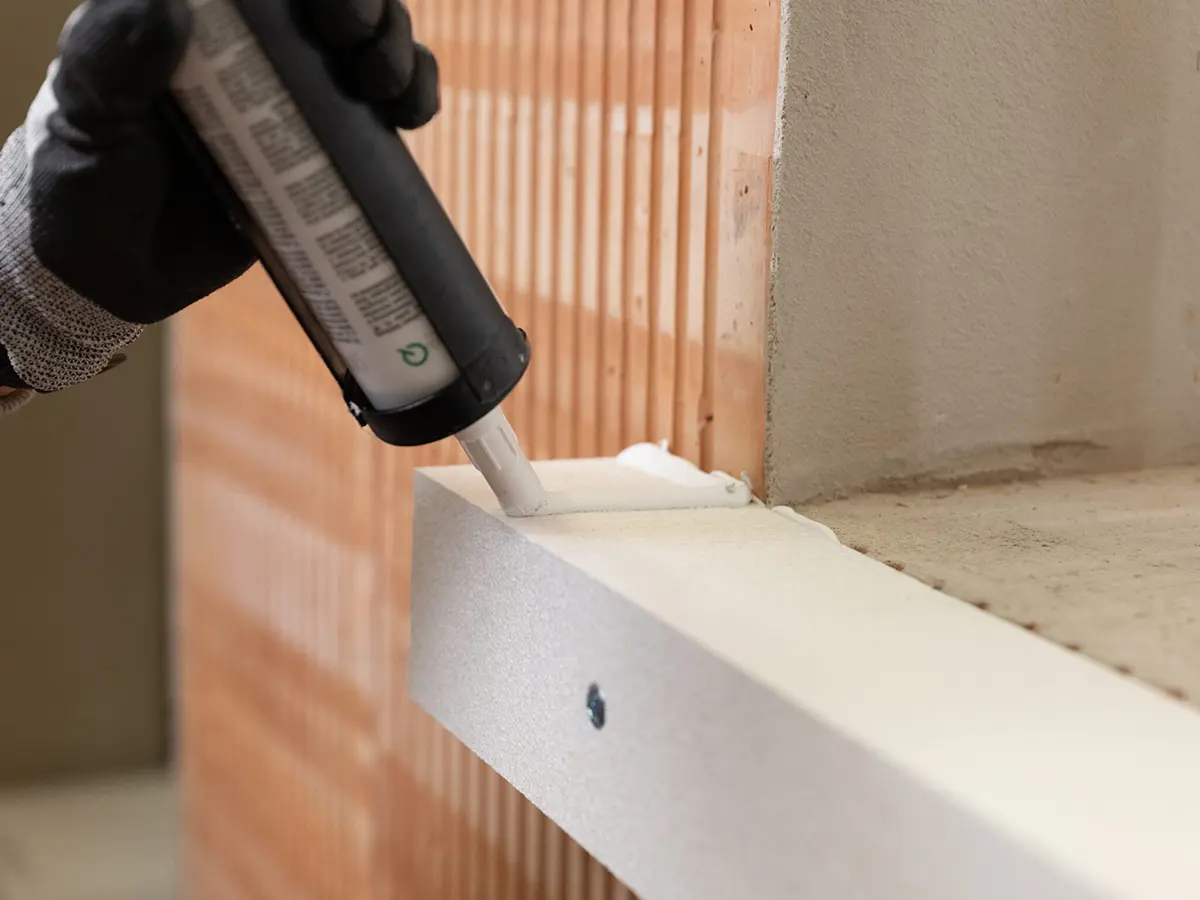
Use MS-Polymer for corner and butt joints to create airtight and watertight connections.
7.5 mm window frame screws with a flat head are used. The screws are available in lengths from 42 mm to 400 mm.
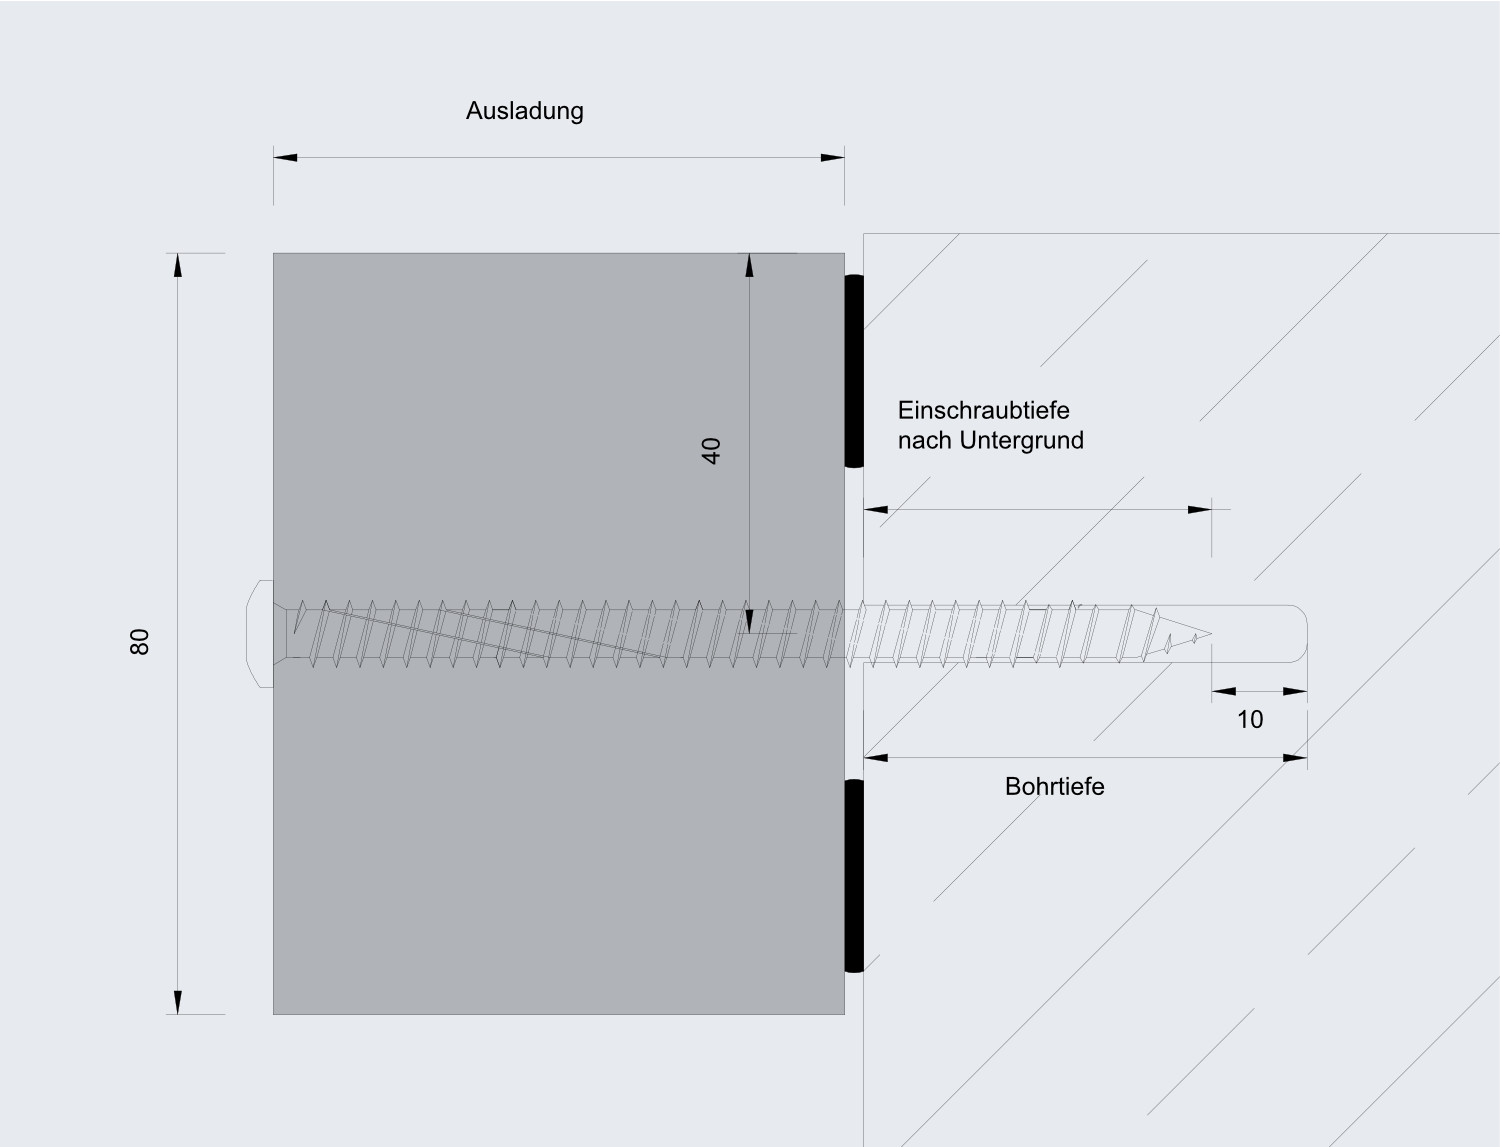
Screw-in depth
The screw-in depth depends largely on the material of the building structure, as different materials have different strengths and properties. Hard materials such as steel or concrete require shallower screw-in depths, while soft materials such as aerated concrete or lightweight bricks require a greater anchoring depth to ensure optimum stability. See table below.
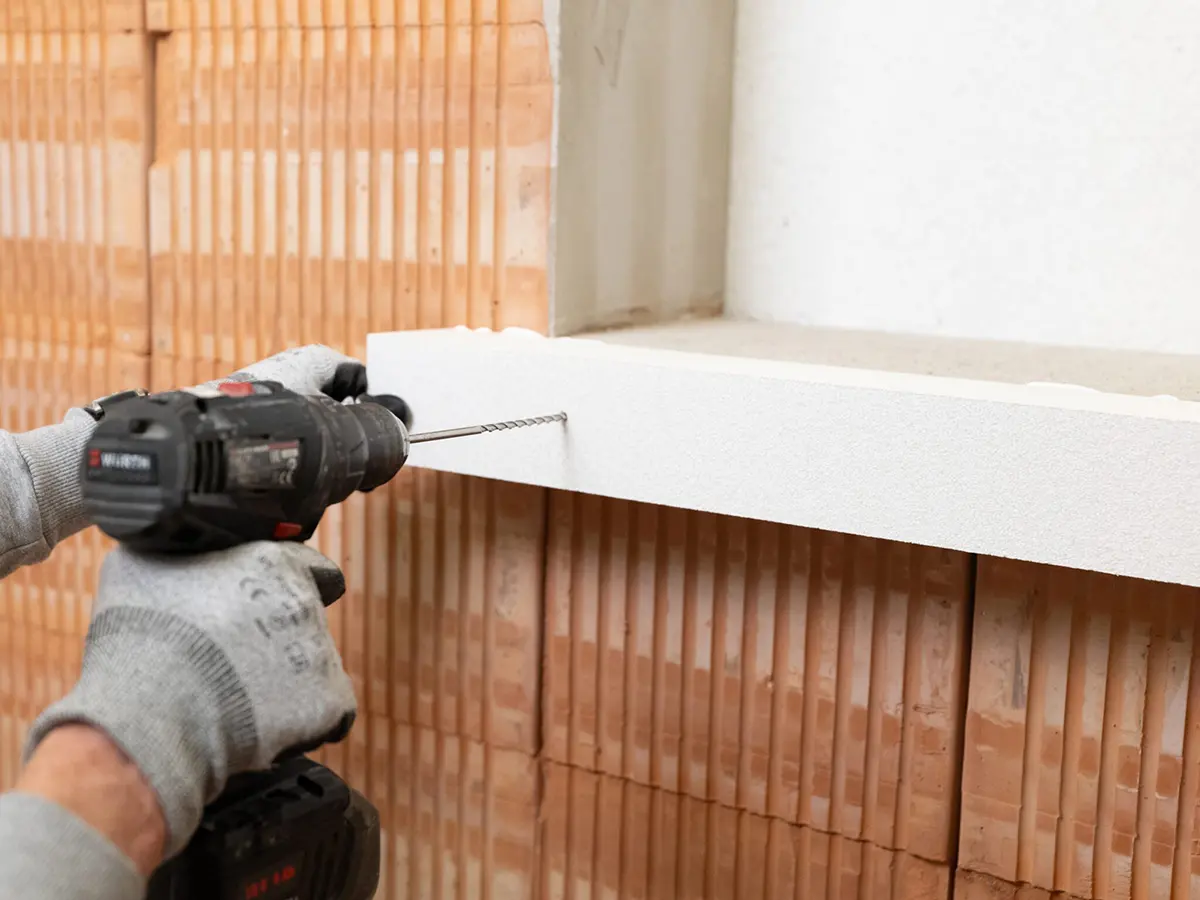
Pre-drilling
The pre-drilling diameter depends on the material of the building structure. Especially for light Drilling with impact should be avoided in order to prevent damage to the material. Please refer to the table below for details.
Screw length
The screw length is determined by the projection of the pre-wall installation system (depth) and the material properties of the building structure (required screw-in depth).
The following applies to the drilling depth: screw-in depth + 10 mm.
Drilling and screwing table
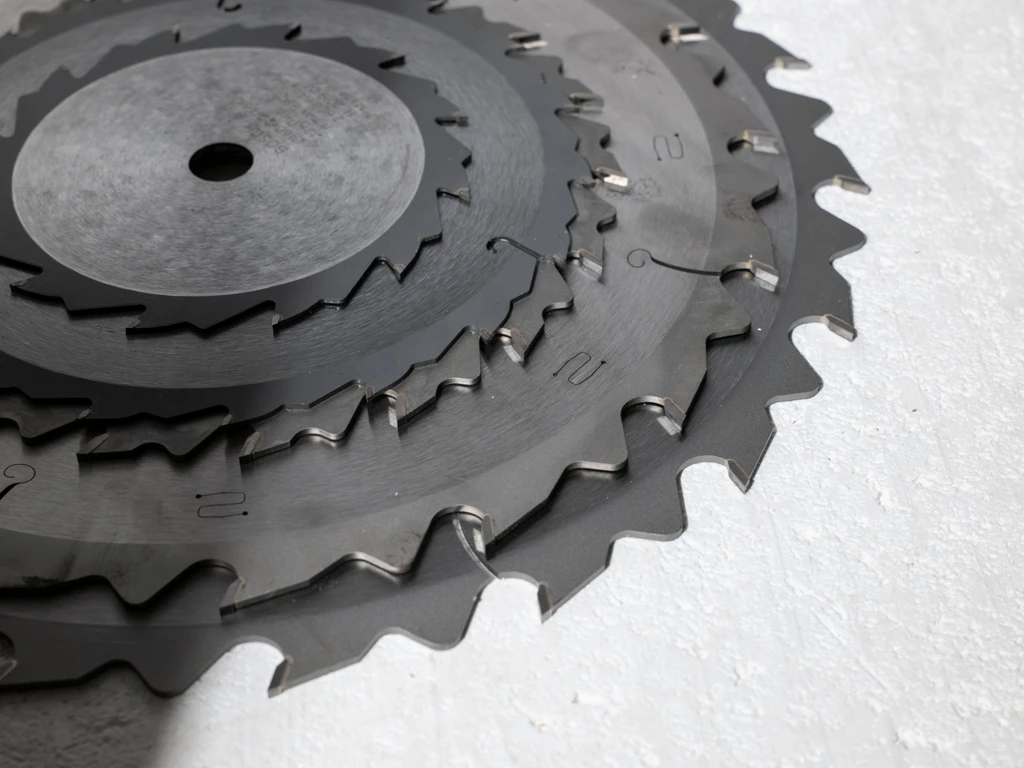
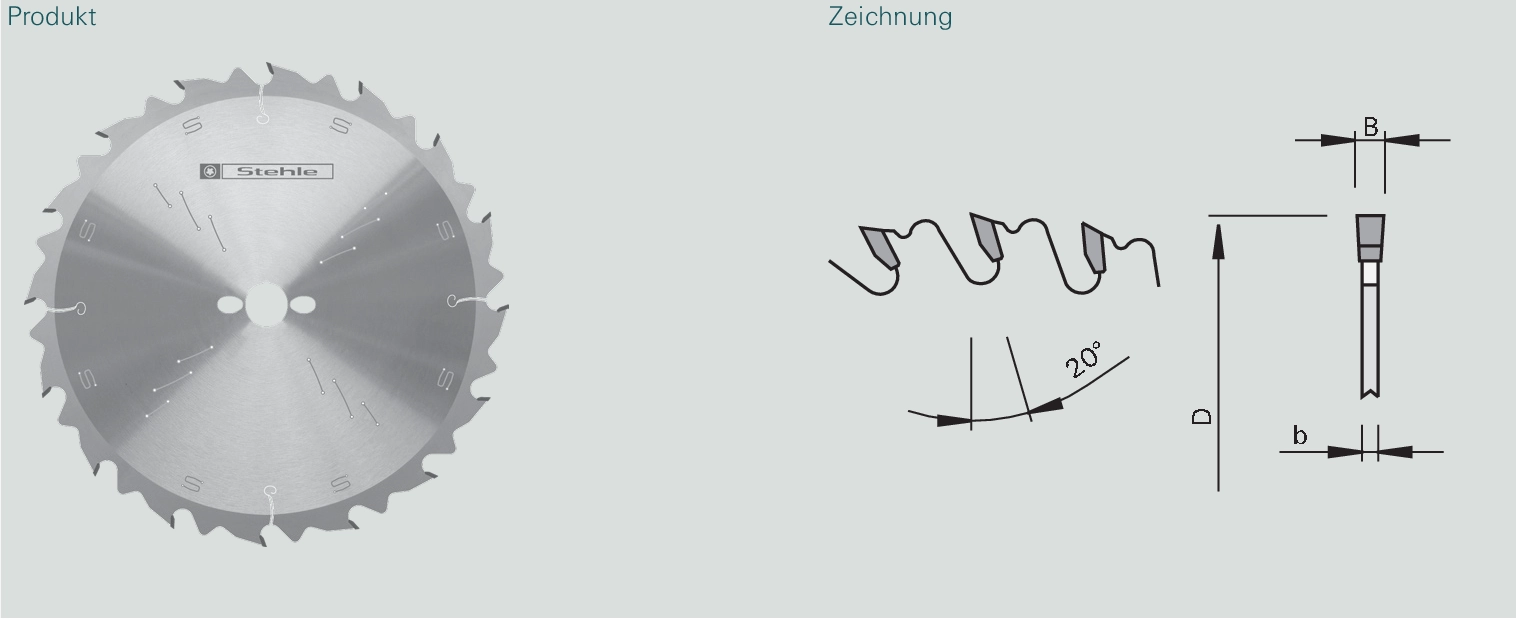
COMPACFOAM can be easily cut to size using commercially available saws such as circular saws, pressure beam saws or hand-held circular saws. It is important to use saw blades with a wide tooth spacing and free chip space.
For the cutting of COMPACFOAM we recommend saw blades with flat teeth and chip thickness limiter and very large tooth pitch. Optimum cutting results are achieved at 2000 rpm.
Saw blade recommendation

The ETB guideline for fall-proof floor-to-ceiling components requires a load-bearing capacity of at least 2.8 kN at the relevant fixing points. The purpose of fall-protection glazing is to protect people from falling to a lower level. They should offer a low risk of injury in the event of an impact and ensure that the traffic area below is not endangered by broken glass. Examples of such glazing include balustrades, glass stair railings and floor-to-ceiling windows.
The Klima Konform system fulfills all of these requirements and thus offers the highest level of protection and safety for fall-proof elements.
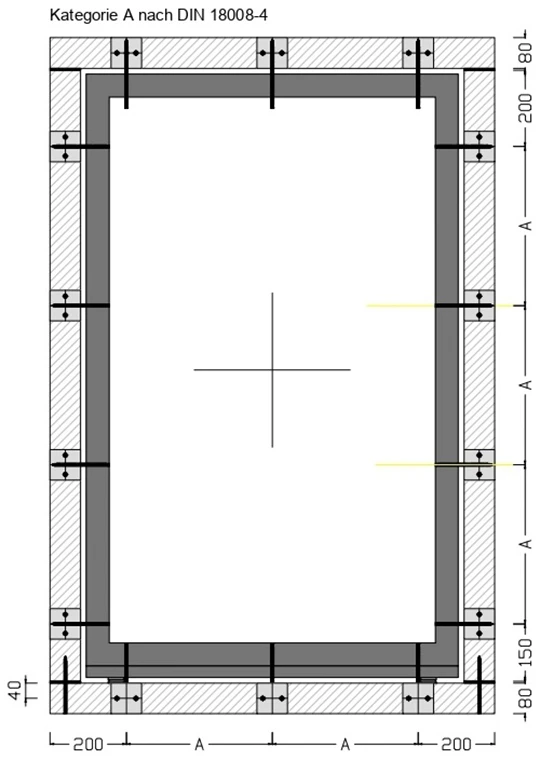
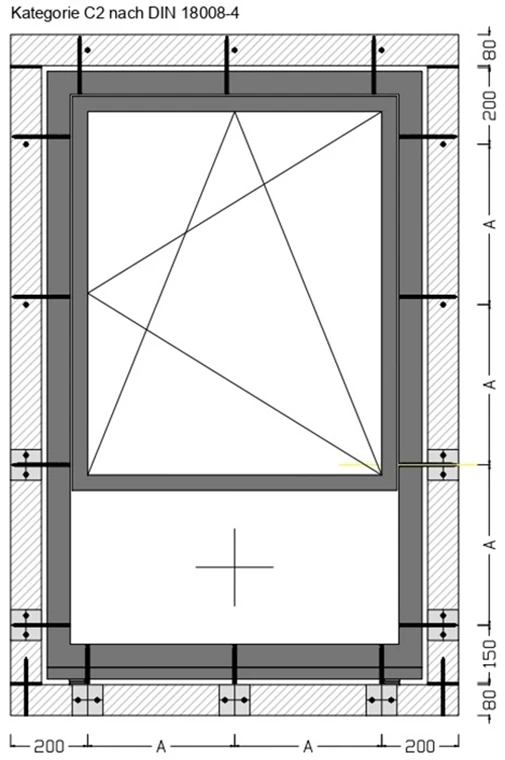

Depending on the category (A/C2/C3), an additional ETB system panel must be fastened to the substrate (wall former) with additional screws for elements with fall protection properties (ETB).
In Austria, the fixing distances for all window types are uniformly specified as 700mm. The RAL guideline (DE) specifies a maximum of 700mm for PVC windows and 800mm for timber and aluminum windows. In principle, national and other specifications must be observed!
Tolerance
Length: +2/-2mm Milling tolerances: +/-0.3mm Bending <3mm Free-standing feather keys +0.0/-0.5mm
Material
CF125 or CFeco200
Burglary protection is tested in accordance with the DIN EN 1627-1630 standard and includes the following requirements:
Resistance to static load.
The load-bearing capacity of the structure is tested by applying pressure loads of 3000 N to all critical points.
Resistance to dynamic load
A pendulum impact test with a 50 kg twin tire tests the stability of the system under dynamic forces at the relevant weak points.
Resistance to manual break-in attempts
In a two-stage test, the critical areas are tested for security using standardized burglary tools. The first test is carried out between the window frame and the Klima-Konform system. In addition, an attack is carried out on the connection of the pre-wall installation system to the wall body.
Sound insulation - Climate compliant
Sound insulation plays a central role in pre-wall installation, particularly in areas such as window construction, façade construction and metal construction. The targeted use of innovative materials and techniques can minimize sound bridges and ensure optimum acoustic properties for the building.
Sound-absorbing materials. High-density materials such as COMPACFOAM offer excellent acoustic properties. The high rigidity effectively minimizes sound bridges and ensures sustainable sound insulation of the building.
Decoupling. Mechanical decoupling of the construction from the wall reduces structure-borne sound transmission to a minimum and optimizes the acoustic performance of the building.
Thermal insulation: fRsi value in pre-wall installation with climate conformity
Mold growth is often caused by excessively low temperatures on the inner reveal surface. DIN 4108-2 defines the temperature factor fRsiwhich describes the ratio of the surface temperature to the inside and outside temperature. A value of at least 0,7 ensures that the temperature remains high enough to prevent mold growth.
In the Standard climate the critical surface temperature is < +12,6 °Cwhich is proof against possible mold growth.
Advantages of installation with Klima Konform
The pre-wall installation system Climate compliant improves the temperature curves between the wall system and the window. The isotherms clearly show the advantages of pre-wall installation compared to conventional installation.
Klima Konform achieves optimum thermal insulation that meets fRsi requirements and prevents mold growth
General conditions
Outdoor temperature: -5 °C
Indoor temperature: +20 °C
Relative humidity outside: 80 %
Relative humidity inside: 50 %
Color coding of the isotherms:


With the help of a newly developed process, particle technology, we can reduce the waste of COMPACFOAM recycle to 100 %. CFeco200, the result of this process, offers the same good properties as COMPACFOAM: high strength with excellent thermal insulation.
You can also order the Klima Konform system in the sustainable recycling version CFeco200.
In any case, you increase the proportion of recycled materials in construction and improve the eco-balance of your project and company. Because environmental protection means keeping things in circulation instead of disposing of them at great expense.